
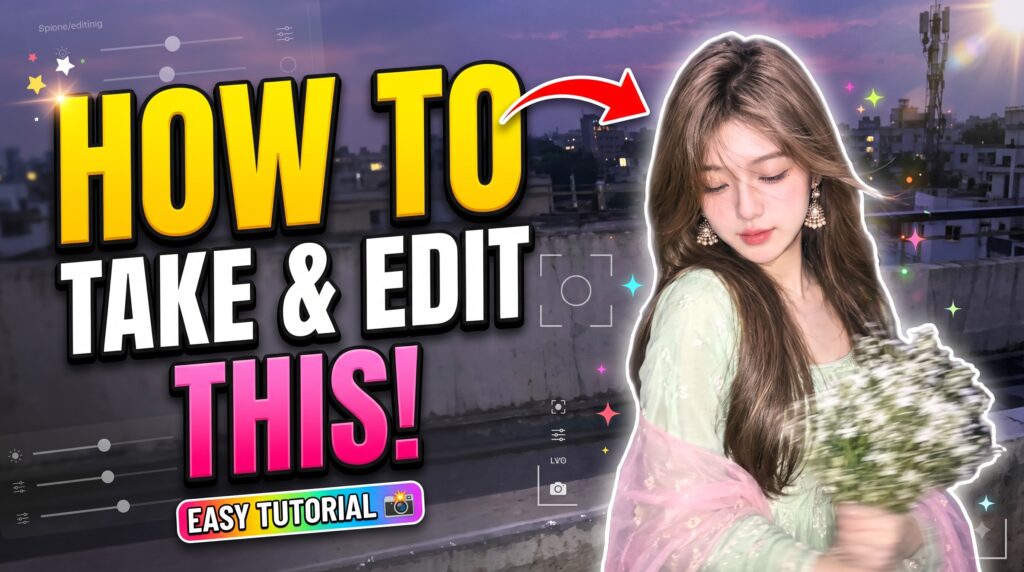
AI-generated photos are becoming extremely popular on Instagram, Pinterest, and other social media platforms. One of the most popular styles is the realistic aesthetic portrait, where you upload your own photo and turn it into a completely new scene while keeping your face and identity recognizable.
In this guide, I will show you how to create this type of cinematic rooftop AI image using ChatGPT, step by step.
Viral AI Photo Prompt
What Is This AI Image Trend?
The image style shown in this trend usually has several elements:
- A realistic portrait
- Your own face and identity
- A cinematic evening background
- A rooftop or city environment
- Soft blue and purple sky
- Traditional or aesthetic clothing
- Jewelry and accessories
- Flowers or other foreground objects
- Smartphone-camera style photography
- Slight motion blur
- Soft depth of field
- Instagram/Pinterest-style composition
- Small aesthetic text on the image
The goal is not simply to generate a random woman or man.
Instead, you provide your own image as the identity reference and tell ChatGPT how you want the final photograph to look.
How to Generate This AI Image Using ChatGPT
Step 1: Open ChatGPT
First, open ChatGPT on your computer or smartphone.
ChatGPT Images is available on web, iOS, and Android, and image generation is available across ChatGPT plans, subject to applicable usage limits. (OpenAI Help Center)
You can start a normal conversation and upload your photograph.
Step 2: Choose a Good Reference Photo
The quality of your original photo can make a big difference.
For the best results, choose a photo where:
- Your face is clearly visible
- The image is reasonably sharp
- Your face is not covered
- Lighting is not extremely dark
- Your hairstyle is visible
- Your facial features are easy to see
- The photo is not heavily filtered
A front-facing or slightly angled portrait usually works well.
You can upload an image by using the Add photos & files option. ChatGPT also supports dragging an image into the conversation on supported platforms. (OpenAI Help Center)
Step 3: Upload Your Photo
After opening ChatGPT, upload the photo you want to use.
Then explain that the uploaded photograph should be used as your identity and appearance reference.
For example:
Use my uploaded photo as the identity reference. Keep my facial features, hairstyle, skin tone and overall appearance recognizable.
This tells ChatGPT that you want the new image to be based on your uploaded photograph rather than creating a completely unrelated person.
Step 4: Describe the Image You Want
This is the most important part.
Don’t simply write:
Make my photo aesthetic.
That instruction is too vague.
Instead, describe the image in different sections.
For example:
Subject
Tell ChatGPT who or what should appear in the image.
Example:
Create a realistic portrait of me standing on a rooftop.
Pose
Explain the position of the person.
Example:
I am looking slightly downward with my eyes gently closed and a peaceful expression.
Clothing
Describe the outfit.
Example:
Dress me in a pastel mint-green traditional Indian outfit with delicate embroidery and a soft pink translucent dupatta.
Accessories
Mention jewelry or other details.
Example:
Add elegant traditional dangling jhumka earrings.
Background
Describe the environment.
Example:
Place me on a rooftop during blue hour with a distant city skyline, buildings and a communication tower in the background.
Lighting
Describe how you want the photograph to look.
Example:
Use realistic smartphone flash photography with a cool purple-blue evening sky and soft cinematic lighting.
This level of detail gives ChatGPT much more information to work with.
Step 5: Add the 9:16 Aspect Ratio
If your goal is Instagram Reels, Stories, WhatsApp Status, or other vertical content, ask for a 9:16 image.
For example:
Create the image in a vertical 9:16 aspect ratio.
ChatGPT Images supports different aspect ratios, and you can either use the aspect-ratio controls or specify the desired ratio in your prompt. (OpenAI Help Center)
For Instagram-style content, 9:16 is generally a useful choice.
Step 6: Add Realistic Photography Details
If you want the image to look less like an AI illustration and more like a real photograph, mention photographic details.
You can ask for:
- Natural skin texture
- Realistic hair strands
- Realistic fabric
- Natural shadows
- Smartphone-camera quality
- Shallow depth of field
- Subtle motion blur
- Cinematic lighting
- Natural proportions
- Realistic flowers
- Slight camera grain
For example:
Make the image look like a real smartphone photograph rather than a digital illustration. Preserve natural skin texture, realistic hair strands, realistic fabric details and natural facial proportions.
Step 7: Add Foreground Objects
One of the details that makes this type of image attractive is the foreground object.
In the reference style, a bouquet of small white flowers partially covers the lower portion of the frame.
You can create the same effect by telling ChatGPT:
Add a large bouquet of small white flowers in the foreground, partially covering the lower-right portion of the image. Keep some flowers slightly motion-blurred to create realistic depth.
This creates a more photographic look.
You can replace flowers with other objects too.
For example:
- Sunglasses
- A coffee cup
- A book
- Leaves
- A dupatta
- City lights
- Fairy lights
- A car
- A motorcycle
Step 8: Add Aesthetic Text
The reference image also contains text at the top.
If you want similar text, explicitly tell ChatGPT what to write.
For example:
Add minimal white text at the top center saying “12 PM” and underneath in smaller text “26-09-26”. Use elegant thin serif typography.
ChatGPT Images can follow instructions to add text and other details inside generated images. (OpenAI Help Center)
However, if the text isn’t perfect on the first attempt, simply ask ChatGPT to correct it.
For example:
Keep everything exactly the same, but correct the top text to “12 PM” and “26-09-26”.
Complete Prompt to Generate the Image
Here is a ready-to-use prompt for creating this style:
Use my uploaded photo as the exact identity and appearance reference.

Create a highly realistic cinematic vertical 9:16 portrait of me on a rooftop during blue hour.

Keep my facial features, facial structure, skin tone, hairstyle, hair color and overall identity recognizable and natural. Do not make me look like a different person.

I am standing on a rooftop and looking slightly downward with my eyes gently closed, creating a peaceful and candid expression.

Dress me in an elegant pastel mint-green traditional Indian outfit with delicate embroidery and a soft translucent pastel-pink dupatta. Add elegant traditional dangling jhumka earrings.

Place a realistic city skyline in the background with distant buildings, a rooftop railing and a tall communication tower. The sky should have beautiful purple-blue evening tones with subtle pink colors.

I am holding a large bouquet of small white flowers. Place the bouquet in the foreground so that it partially covers the lower-right part of the frame. Add subtle natural motion blur to some flowers.

Make the lighting look like a smartphone flash photograph taken during blue hour. Use realistic flash illumination on the subject, soft shadows, natural skin texture and realistic hair strands.

The photograph should look like a spontaneous Instagram/Pinterest aesthetic photograph rather than a studio photoshoot.

Use realistic photography, shallow depth of field, subtle motion blur, natural colors, realistic fabric texture, detailed jewelry, realistic flowers, cinematic lighting and premium smartphone camera quality.

Add minimal white text at the top center:
"12 PM"

Under it, add smaller text:
"26-09-26"

Use elegant thin serif typography with clean spacing.

Preserve my identity and natural facial proportions. Do not make the face look artificial or overly beautified.
Step 9: Generate the First Version
After entering the prompt, send it to ChatGPT.
The image generation process may take some time depending on the request. You can continue using ChatGPT while the image is being generated. (OpenAI Help Center)
Don’t worry if the first result isn’t perfect.
AI image generation usually works best as an iterative process.
Step 10: Improve the Image With Follow-Up Prompts
This is one of the biggest advantages of using ChatGPT.
You don’t always need to start over.
After receiving the image, you can simply tell ChatGPT what needs to change.
For example:
If the face looks different
Keep the current composition, but make the person’s face more closely match my uploaded reference photo. Preserve the original facial structure and features.
If the image looks too artificial
Make the image look more like a real smartphone photograph. Reduce the artificial AI appearance and add natural skin texture and realistic lighting.
If the background is too bright
Make the background darker and create a deeper purple-blue evening sky while keeping the subject clearly visible.
If the flowers are too large
Reduce the size of the bouquet and keep it partially blurred in the foreground.
If the outfit needs improvement
Keep the face and composition unchanged. Make the mint-green outfit more elegant with realistic embroidery and fabric texture.
ChatGPT allows you to edit generated images and describe the changes you want directly in the conversation. You can also use the image editor and select a particular area for an edit. (OpenAI Help Center)
How to Change Only One Part of the Image
Suppose you like everything except the background.
Instead of generating the whole image again, tell ChatGPT:
Keep the person, face, outfit, flowers and pose exactly the same. Change only the background to a realistic rooftop city skyline during blue hour.
You can also use the selection tool in the image editor to highlight the area you want to change and then describe the modification. (OpenAI Help Center)
This can be particularly useful when you already have a good result.
How to Make the Image Look More Viral
If you want an Instagram-style aesthetic, focus on these five things:
1. Strong composition
Don’t place every element randomly.
Specify:
- Subject position
- Camera framing
- Background
- Foreground
- Head position
2. Good lighting
Lighting can dramatically change the mood.
Try:
- Blue hour
- Golden hour
- Flash photography
- Sunset
- Night photography
- Neon lighting
3. Natural expressions
Instead of always asking for a big smile, try:
- Looking down
- Looking away
- Eyes closed
- Slight smile
- Candid expression
- Looking toward the sky
4. Foreground depth
Objects close to the camera can make an image look more like a real photograph.
Flowers, leaves, lights or other objects can create this effect.
5. Keep the identity consistent
If you are using your own photo, explicitly tell ChatGPT to preserve your facial identity and natural proportions.
Best Prompt Formula for AI Photos
You can also create your own prompts using this simple formula:
Identity + Pose + Outfit + Location + Background + Lighting + Camera + Details + Aspect Ratio
For example:
Identity: Use my uploaded photo as the identity reference.
Pose: Looking downward with eyes closed.
Outfit: Pastel traditional outfit.
Location: Rooftop.
Background: Purple-blue city skyline.
Lighting: Smartphone flash during blue hour.
Camera: Realistic smartphone photography.
Details: Flowers, earrings, natural hair and subtle motion blur.
Aspect ratio: 9:16.
This formula can be used for almost any AI portrait trend.
Different Variations You Can Try
Once you understand the basic technique, you don’t have to copy the exact rooftop scene.
Try different concepts.
Sunset Rooftop
Create a realistic sunset rooftop portrait with warm orange and pink sky, natural wind in the hair and cinematic smartphone photography.
Rainy Street
Transform the scene into a realistic rainy city street at night with wet roads, reflections and soft neon lights.
Traditional Festival
Place me at a beautifully decorated Indian festival location with warm lights, flowers and traditional clothing.
Beach Portrait
Create a realistic beach portrait during sunset with soft wind, ocean waves and warm cinematic lighting.
Winter Aesthetic
Create a cozy winter portrait with a warm sweater, soft snowfall and a blurred city background.
Common Mistakes to Avoid
Don’t use extremely short prompts
A prompt like:
Make me look beautiful.
doesn’t provide enough information.
Instead, explain the scene, pose, clothing, lighting and composition.
Don’t change everything at once
If you already have a good image, make small changes.
Instead of:
Change the face, outfit, background, flowers, lighting and pose.
Try:
Keep everything the same. Change only the background to a rooftop at sunset.
This makes your editing request much clearer.
Don’t overuse beauty instructions
If you repeatedly ask for:
Perfect skin, perfect face, flawless beauty, model face…
the result may become less natural.
For realistic photography, use phrases such as:
Natural skin texture, realistic facial proportions, authentic smartphone photography.
Can You Use Your Own Photo With ChatGPT?
Yes. ChatGPT supports image inputs, allowing you to upload photographs and use them in conversations. (OpenAI Help Center)
You can then ask ChatGPT to analyze or modify the image.
For image editing, you can upload an existing image and describe what you want changed. (OpenAI Help Center)
For personal photos, it is also a good idea to avoid uploading images containing sensitive information that you do not want to share.
Final Result
The main trick behind these viral AI photographs isn’t just the AI tool.
It is the quality of the prompt.
A good prompt tells ChatGPT:
Who is in the image → what they are wearing → what they are doing → where they are → what the background looks like → how the lighting should look → how the camera should look → what details should be included → what aspect ratio is required.
Once you understand this structure, you can create many different Instagram-style AI photos from your own images.
Frequently Asked Questions
1. Can I create this type of image using ChatGPT?
Yes. ChatGPT Images can create new images and edit existing uploaded images using natural-language instructions. (OpenAI Help Center)
2. Can I use my own photo?
Yes. You can upload an image to ChatGPT and provide instructions for how you want it used or edited. (OpenAI Help Center)
3. Can I create a 9:16 image?
Yes. ChatGPT Images supports different aspect ratios, including vertical formats, through its image controls or by specifying the desired ratio in your prompt. (OpenAI Help Center)
4. Can I change the image after generating it?
Yes. You can ask ChatGPT to make additional changes to the generated image, or use the image editor to select a specific area and describe the edit. (OpenAI Help Center)
5. How do I make my AI photo look realistic?
Mention realistic skin texture, natural facial proportions, realistic hair, authentic lighting, realistic fabric, natural shadows, shallow depth of field and smartphone photography.
6. Can I change only the background?
Yes. Tell ChatGPT to keep the subject unchanged and modify only the background. You can also select the background area using the editor when appropriate. (OpenAI Help Center)
Conclusion
Creating this type of viral AI image with ChatGPT is quite simple once you understand how to write a detailed visual prompt.
Start with a clear personal photo, upload it to ChatGPT, describe the pose, outfit, background, lighting and photography style, and specify 9:16 if you want a vertical Instagram-style image.
The best part is that you don’t have to get everything perfect in the first attempt. Generate the image, check the result, and then ask ChatGPT to make small improvements until you get the look you want.
For the most realistic results, focus on natural identity, realistic lighting, detailed environments, authentic photography and controlled editing rather than simply asking for a “beautiful AI photo.”
Official reference: ChatGPT Images Help Guide ChatGPT Image Inputs FAQ
Table of Contents

Pratiksha Thakare is a Vedic astrology writer and spiritual researcher with deep study in Jyotish, numerology, and Hindu philosophy. She writes to make ancient wisdom simple and accessible for modern Indian readers.